Home › Field notes › Modular Bag for Park Ranger Patrols: Patrol Duration, Records Kit and
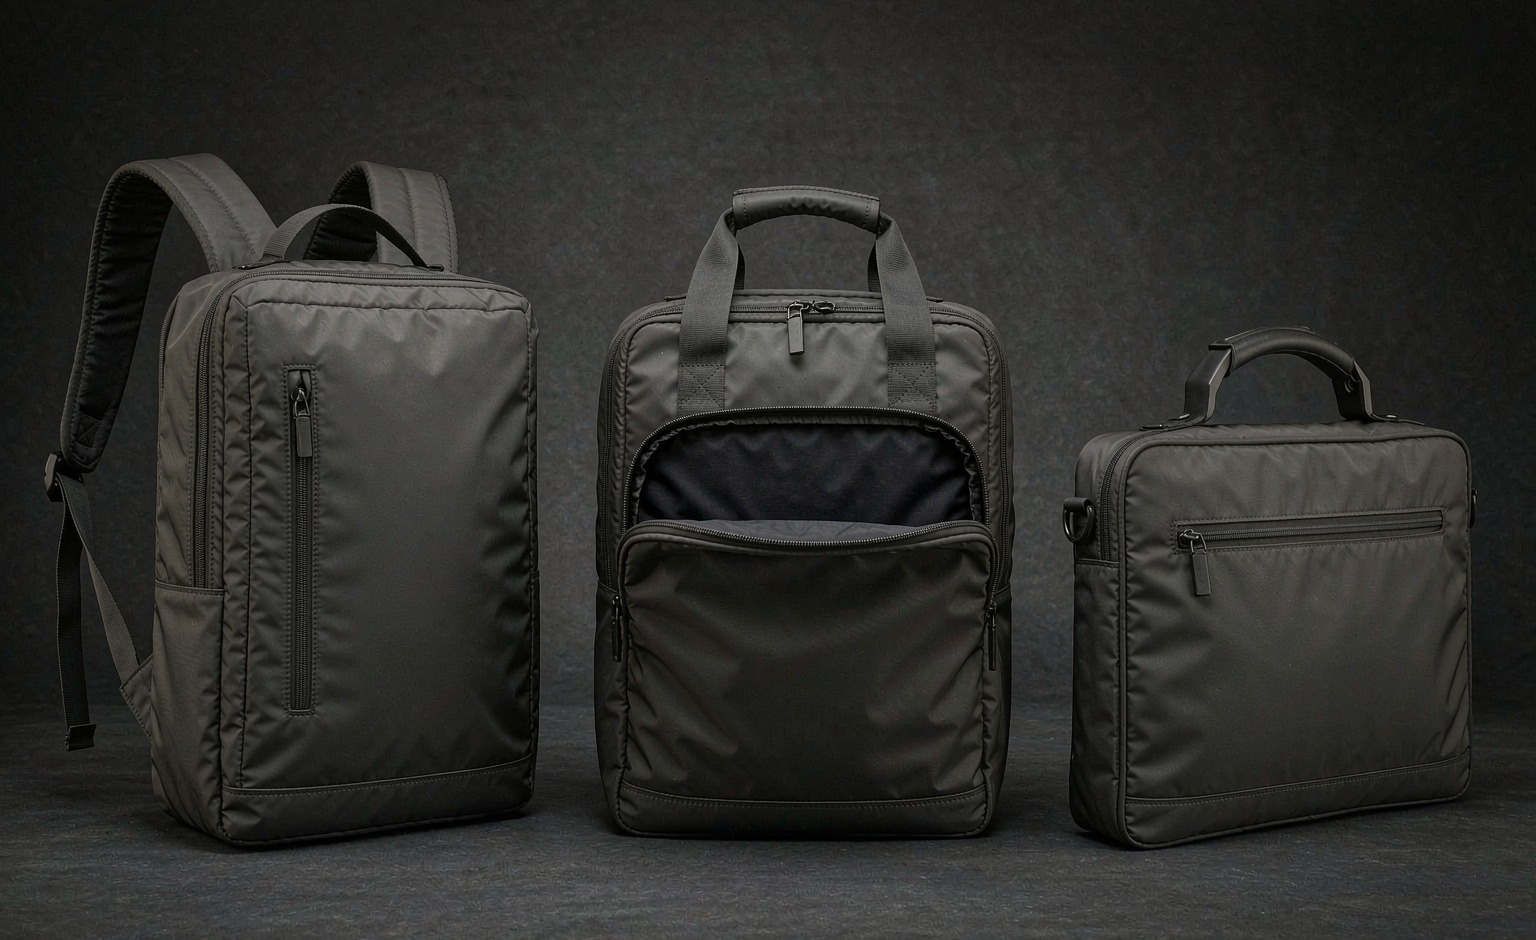
A modular bag for park ranger patrols is a mid-volume day platform, typically 25-35 litres, laid out so water, radio, recording tools and a small first-aid module are reachable while the wearer is standing and talking to a member of the public. Order terms hold at 500 pieces per reference, a first sample inside 6-10 working days, bulk production 35-50 days from pre-production sign-off to shipment, inspection at AQL 2.5 under ISO 2859-1 level II, and pricing FOB Xiamen. The boundary matters: this covers civilian park, estate, reserve and conservation patrol work only. Duty belts, radios, licensing and any interaction with the public are governed by the employer's own policy and by local law, and nothing on this page is law-enforcement, wildlife-handling or first-aid instruction.
What a Ranger Carries Across an Eight-Hour Foot Patrol
A foot patrol is a working day, not a hike. The wearer covers 8-15 km, mostly at conversation pace, stops repeatedly, and is expected to produce a notebook, a permit form or a device within a few seconds of being asked. The bag has to support that pattern rather than the pattern of a weekend walker, which is a different product from a weekend hiking carry platform even though the two look similar on a shelf.
The load is lighter than a rescue load and carried for just as long. Radio with a spare battery, a handheld device or tablet in a sleeve, a waterproof notebook, pens, a small tool roll, a litter bag, a rain shell, gloves, lunch and 2-3 litres of water come to 7-11 kg depending on season. That figure sits below the threshold where a heavy hip belt earns its mass, and above the point where a simple daypack shoulder harness becomes uncomfortable by mid-afternoon.
Volume follows: 25-35 L is the working range. Below 25 L the rain shell and the water compete for the same space every single day; above 35 L the bag starts to look like an expedition pack in a visitor setting and tempts the wearer to carry things that belong in the vehicle. The attachment face is what keeps the volume honest - kit that is needed fast goes outside, and the main body stays for clothing and food.
Access pattern is the last defining property. On patrol, the bag is opened standing up, often one-handed, often while holding a dog lead, a gate key or a clipboard. Front-opening access with a lid that stays put beats a top-loader for this use, and the two or three items accessed most often should be in external pouches rather than in the main body.
- Distance per shift: 8-15 km on foot
- Working load: 7-11 kg with 2-3 litres carried
- Main body: 25-35 L
- Openings per shift: 15-30, mostly standing and one-handed
- Items needing external access: radio, notebook, water, first-aid module
Bottom line: Specify a 25-35 L patrol bag for a declared 7-11 kg load with front-opening access, and put the radio, notebook, water and first-aid module on the outside rather than in the main body.
Hydration Carriage and Cleaning on Long Walking Days
Water is the heaviest single item on most patrols and the one most frequently carried badly. Three carriage routes exist, and the decision is less about litres than about refill time and cleaning effort, because a reservoir that is awkward to dry will be left wet and will grow a film within a season.
An internal reservoir in a sleeve against the back panel carries the water close to the spine and keeps both hands free, but refilling means opening the bag and threading the bladder back into a sleeve, which is a two to four minute job at a tap. Side bottle pockets are far quicker to refill and let the wearer see how much is left, at the cost of a small asymmetry and of bottles that work loose in open pockets. A front shove-it pouch holding two bottles is the fastest to reach and the worst for balance, because the mass sits away from the spine.
Cleaning decides the long-term result. A reservoir needs a wide opening, a drying hanger and a tube that can be detached; a bottle needs a mouth wide enough to brush. Whichever route is chosen, the specification should state how the system is dried at the end of a shift, because that step - not the material - is what determines whether mould appears.
| Selection criterion | Internal reservoir sleeve | Two side bottle pockets | Front shove-it bottle pouch |
|---|---|---|---|
| Usable capacity | 2-3 L in one bladder | 1.5-2 L in two bottles | 2 L in two bottles |
| Refill time at a tap | 120-240 s, bag must be opened | 20-40 s, bottles pulled out | 15-30 s |
| Time to drink while walking | 2-4 s, tube to hand | 8-15 s, bottle located by feel | 6-12 s |
| Drying effort at end of shift | High, needs a hanger | Low, bottles air-dry | Low |
| Effect on centre of gravity | Best, mass against the spine | Fair, mass either side | Poor, mass swings forward |
| Failure mode in service | Film in the tube, bite valve leak | Bottle lost from a loose pocket | Bottle ejected when kneeling |
| Added empty mass | 180-320 g with sleeve | 60-120 g | 90-160 g |
Two litres carried well beats three litres carried badly. Where the route has a reliable refill point, a 1.5-2 L pair of bottles in side pockets keeps the load lower and the drying step trivial; where it does not, a reservoir earns its cleaning cost.
Takeaway: Choose side bottle pockets where a refill point exists within the shift and a reservoir above 2.5 L per day where it does not, and write the end-of-shift drying step into the patrol routine because that step decides whether the system stays hygienic.
Recording and Communications Equipment: Protection, Power and Antenna Clearance
Rangers carry more electronics each season: a radio, a handheld device for records and photographs, sometimes a small tablet for survey work, and the batteries and cables that go with them. A bag designed before those items existed puts them in the wrong places, and the failure is usually slow - a cracked screen, a bent antenna, a flat battery at the far end of the route.
Drop protection comes from position before padding. A device against the back panel is protected by the wearer's own back on a fall and is the safest place for a tablet; a device in an external pouch is exposed but accessible, which suits a radio. The compromise most programmes settle on is the device in an internal sleeve near the top of the bag and the radio carried on the harness, where it can be used without touching the bag at all.
Antenna clearance is the detail that gets missed. A radio mounted on a shoulder strap needs a clear vertical path; if the antenna is trapped under a load lifter or folded by a lid, range suffers and the antenna base wears. Cable routing matters as much: a cable that runs across a strap adjustment point gets pinched, and a cable that runs inside the bag gets pulled every time the lid opens.
Power access should not require unpacking. A spare battery in a pouch on the attachment face, plus a short cable route to the shoulder, means a battery change takes under thirty seconds on the move. The same logic applies to a power bank for a recording device: it belongs in an external pouch with a covered port, not at the bottom of the main body under a rain shell.
| Selection criterion | Chest harness mount | Shoulder-strap pouch | Internal sleeve near the lid |
|---|---|---|---|
| Time to bring the device into use | 1-3 s, always in front | 4-8 s | 10-20 s, bag must be opened |
| Drop protection | Poor on a forward fall | Fair | Best, protected by the back panel |
| Antenna clearance | Best, vertical and clear | Good if kept above the lifter | Poor, antenna inside the bag |
| Interference with pack straps | High, crosses the sternum strap | Low | None |
| Heat build-up on the device | Low | Low | Moderate against the back |
| Suits which device | Radio, small recorder | Radio, phone | Tablet, survey device |
| Works with a duty belt | Often conflicts | Usually clear | Always clear |
Small item organisation follows the same rules as any kit; the approach used for chest and waist carry modules transfers directly to radio and recorder placement, and responders already familiar with that layout adapt quickly.
Selection rule: Put the radio on a shoulder-strap pouch with clear antenna path, keep any tablet in an internal sleeve near the lid, and carry at least one spare battery in an external pouch so a change takes under 30 seconds without opening the bag.
Uniform Compatibility: Colourways, Insignia Panels and Duty-Belt Conflict
A patrol bag is part of a uniform, and uniform systems are conservative. Three friction points come up repeatedly: colour, insignia, and the collision between the pack's hip belt and the wearer's duty belt.
Colour is usually dictated rather than chosen. Where a service already specifies a garment colour, the bag reference should be matched to it in the same dye lot logic as the garments rather than approximated from a swatch, because two olive fabrics that match indoors can separate badly in daylight. Where no colour is dictated, a mid-tone that hides dust and does not show grime is the practical answer, and a navy or dark grey reads as official without shouting.
Insignia should be a panel, not a print on the body. A removable loop-field panel of 80-150 mm carries a badge, an identifier or a role mark; it can be changed when a role changes, replaced when it wears out, and removed when the bag is used off duty or transferred between staff. Printing the same mark directly on the shell makes the bag role-locked and forces a whole-bag replacement for a one-word change.
The duty-belt collision is the one that causes real discomfort. A wide padded pack hip belt sits exactly where a duty belt sits, and the two fight for the same few centimetres of hip. The workable answers are a narrow webbing belt on the pack, a hip belt that can be removed entirely on a 25-30 L bag, or a pack profile shaped to sit above the duty belt. Programmes that ignore this end up with bags worn on one shoulder, which is how a patrol bag earns a bad reputation with the people who have to wear it.
Verdict: Match the shell colour to the issued garment reference, carry insignia on a removable 80-150 mm loop panel rather than a body print, and resolve the hip-belt clash with a removable or narrow belt because a bag worn on one shoulder all day is a bag the team will reject.
Pouch Layout on the Attachment Face for Patrol Work
Patrol pouches are small and numerous rather than few and large, which makes the attachment face the whole layout tool. Three dimensions govern whether a pouch bought next year still fits a bag bought this year. Webbing comes in at 25 mm, rows step 38 mm apart vertically, and the stitch islands that create the strap gaps repeat every 50 mm horizontally. Put all three on the control drawing and the fleet stays interchangeable across separate production lots.
Placement follows access frequency. The radio sits high, on a shoulder strap or the upper rows of the face, because it is used dozens of times a shift. A first-aid module sits on an outer face where a colleague can reach it while the wearer is still wearing the bag, which is the whole point of carrying it there. Water sits low, notebooks and forms sit in the lid or a flat rear pocket, and anything sharp or gritty goes in a closed pouch rather than an open one.
Pull strength of the webbing and of the stitch that anchors it is measured to ASTM D5034, while resistance to rubbing of the same narrow fabric is covered by ASTM D3884. Those two figures tell a buyer whether a pouch face will survive a season of daily use; they do not tell a buyer whether a pouch will stay put, which is why the drawing must also state how many rows each pouch engages and where the row ends are anchored.
One practical rule finishes the layout: no pouch should cover the access path of another. A large pouch mounted over the lid zip, or a bottle pocket mounted over the radio pouch, will generate a complaint on the first day and a modification request on the second.
Layouts built on the published PALS grid geometry also make reordering simpler, because pouches and shells can be bought in separate lots without a refit.
Judgement: Hold 25 mm webbing, 38 mm row pitch and 50 mm column repeat on the drawing, place the radio high and the first-aid module on an outer face a colleague can reach, and reject any layout in which one pouch blocks the access path of another.
Fabric Selection for Abrasion, Sun Exposure and a Season of Daily Use
A patrol bag does not usually fail in one dramatic event. It fails gradually: the shoulder strap binding frays, the base corners go shiny and then thin, the colour fades unevenly, and the coating on the lid starts to chalk. All four are material selection problems that show up after roughly one season of daily wear.
Face cloth abrasion is measured to ISO 12947, and it is the primary figure for this category because a patrol bag spends its life rubbing against gates, vehicle seats, stone walls and its own hip belt. Webbing abrasion is covered separately by ASTM D3884, which matters for the strap binding and for the attachment rows.
Sun exposure is the second mechanism, and it is the one most frequently left out of the specification. Ultraviolet degradation attacks the fibre and the coating at different rates, so a fabric can lose strength while still looking acceptable. Where a service operates in high-insolation regions, the specification should ask for an accelerated exposure result alongside the abrasion figure rather than relying on a denier number alone.
Base and corner reinforcement is cheaper than a heavier whole-shell fabric and more effective. A 500D shell with a 1000D base panel and bound corners outperforms a uniform 1000D shell on mass and on cost, because wear is concentrated at the bottom and at the contact points rather than spread evenly.
Spec rule: Request an ISO 12947 abrasion figure for the face cloth and an ASTM D3884 figure for the webbing, ask for an accelerated ultraviolet exposure result where the patrol area has high insolation, and reinforce base and corners with a heavier panel rather than upgrading the whole shell.
Inspection, Cleaning and End-of-Season Storage for Patrol Bags
Patrol fleets are maintained by the people who use them, which means the maintenance procedure has to be short enough to actually happen. A four-page checklist is ignored; a one-minute routine with four checks is not.
The checks that matter are the ones that precede a failure: strap binding fraying at the top stitch, attachment row islands lifting, zip teeth spreading at the base of the run, and coating chalking at the folds. Each has a visible precursor, and each is cheap to act on if it is caught early. Cleaning should be specified as a wipe and an air-dry rather than a machine cycle, which keeps coatings and prints intact and avoids the shrinkage problems that come with hot washing.
End-of-season storage is where most fleets lose bags. Stored damp in a vehicle or a shed, a patrol bag comes back in spring with mildew in the lining and corrosion on metal hardware. The storage step is simple enough to be worth writing down: empty, wipe, dry fully for at least 24 hours, store loosely packed off the floor with zips open and straps relaxed.
| Item checked | Interval in service days | Action when the signal appears |
|---|---|---|
| Strap binding at the top stitch | 20 | Return for restitch before the seam runs out |
| Attachment row islands | 20 | Re-anchor if two adjacent islands lift |
| Main and pocket zips | 10 | Replace slider at first tooth spread |
| Coating at the fold lines | 40 | Withdraw if substrate is exposed |
| Hydration sleeve and tube | 5 | Dry fully; replace the tube if filmed |
| Radio pouch retention | 10 | Re-weave the strap if the pouch shifts |
| Insignia panel | 40 | Replace when the edge curls or the mark fades |
Run a four-check routine every 20 service days, dry every bag fully for at least 24 hours before end-of-season storage, and store loosely packed with zips open so the fleet comes back usable in spring.
Production Capacity and Sampling Gates for Ranger Fleet Orders
Ranger fleets are bought by a park service, a contractor or an estate, usually against a budget year, and usually with a badge requirement that has to be approved before anything is cut. That approval step, not the sewing, is what decides whether a fleet lands before the season.
Programme work is coordinated through the production lines we schedule on: a 4,950 m² SGS-verified floor where 137 staff run 7 production lines and 149 machines in total, and output across those lines reaches 200,000 pieces monthly when every programme is counted. Six to ten working days is the normal return for a first sample, rising to 12-15 where the face layout, the harness and the insignia panel are all new at once; bulk then runs 35-50 days from pre-production sign-off, with inspection at AQL 2.5 under ISO 2859-1 level II before shipment.
The badge and colour path is the part worth front-loading. Colour matching to an issued garment reference and loop-panel artwork approval both sit outside the sewing schedule, and both are far cheaper to settle during sampling than to correct after bulk has started. The layouts proposed here come out of bag production experience reaching back to 2004, and the company itself was established in 2014.
Settle colour matching and insignia artwork during the 6-10 working day sampling window rather than after bulk starts, because both sit outside the sewing schedule and both cost more to correct once production has begun.
Freight Cube, Sampling Cost and Reorder Planning for Estate Fleets
Patrol bags pack well when they are packed deliberately. Nested in pairs with the hip belt folded in, a 30 L bag occupies far less cube than the same bag shipped with straps extended, and the difference across a fleet of a few hundred bags is a container decision rather than a rounding error.
Work on about 28 CBM inside a 20GP and roughly 68 CBM inside a 40HQ, and treat both figures as ceilings rather than targets. Transit runs 25-35 days by sea, 5-8 days by air and 3-5 days by express courier, and the sensible pattern for a budget-year order is one sea shipment with a small air top-up of pouch replacements and spare insignia panels.
Sampling is cheap insurance. Allow USD 50-150 per reference for a first sample, that money returning when the bulk lands; new tooling and screens for a panel or a printed insignia set run USD 300-2,500. Quotes for custom modular backpack programmes come back 24-48 hours after a full specification is received, FOB Xiamen, payment on T/T 30/70, and a 500-piece floor per reference.
Reorders are where the modular decision pays back. If pouches and shells share the published grid geometry, a mid-season pouch order does not require a refit, and a replacement insignia panel does not require a new bag. Fleets should therefore hold pouches and panels as spares at roughly one set per five bags and reorder shells on a slower cycle.
Move the fleet by sea with 25-35 days of transit and cube held under 28 CBM per 20GP, hold pouches and insignia panels as spares at one set per five bags, and reorder shells on a slower cycle than consumables.
Frequently asked questions
What size bag is right for a park ranger patrol?
25-35 L for an eight-hour foot patrol carrying 7-11 kg including 2-3 litres of water. Below 25 L the rain shell and the water compete for space daily; above 35 L the bag reads as an expedition pack in a visitor setting.
- Main body 25-35 L
- Working load 7-11 kg
- Front-opening access
How much water should a ranger patrol bag carry?
Two to three litres for a full shift, carried as two bottles in side pockets where a refill point exists or as a reservoir above 2.5 L per day where it does not. Refill time is the deciding factor: bottles take 20-40 seconds, a reservoir 120-240 seconds.
- 2-3 L total
- Bottles for quick refill
- Reservoir where no tap
Where should a ranger carry a radio on a patrol bag?
On a shoulder-strap pouch with a clear vertical antenna path, or on a chest mount where no duty belt is worn. Antennas trapped under a load lifter lose range and wear at the base within a season.
- Shoulder pouch, 4-8 s access
- Clear antenna path
- Spare battery in an external pouch
How is a tablet or survey device best carried on patrol?
In an internal sleeve near the lid, where the wearer's back protects it on a fall and the lid opening gives access in 10-20 seconds. External pouches expose it to knocks and to rain, which is the usual cause of early loss.
- Internal sleeve near the lid
- Padded, close to the back panel
- Cable route that does not pinch
Can a patrol bag be matched to an issued uniform colour?
Yes, and it should be matched to the issued garment reference rather than to a loose swatch, because two similar fabrics can separate badly in daylight. Where no colour is dictated, a mid-tone that hides dust works best.
- Match the garment reference
- Confirm in daylight
- Mid-tone where free choice
Should ranger insignia be printed on the bag or on a panel?
On a removable loop-field panel of 80-150 mm. A panel can be changed when a role changes, replaced when it wears out, and removed for off-duty use, while a body print locks the bag to one role and forces whole-bag replacement.
- Removable 80-150 mm panel
- Replaceable without a new bag
- Role changes handled by panel
How do you stop a pack hip belt clashing with a duty belt?
Use a narrow webbing belt, make the hip belt removable on a 25-30 L bag, or shape the pack profile to sit above the duty belt. Wide padded belts compete for the same few centimetres and end with the bag worn on one shoulder.
- Narrow or removable belt
- Profile shaped to sit above
- Avoid one-shoulder wear
Which fabric tests matter for a ranger patrol bag?
Abrasion of the face cloth to ISO 12947 and abrasion of the webbing to ASTM D3884, because the bag rubs against gates, vehicle seats and walls daily. Ask also for an accelerated ultraviolet exposure result in high-insolation regions.
- ISO 12947 face abrasion
- ASTM D3884 webbing abrasion
- UV result where sunny
Is a heavier shell or a reinforced base the better spend?
A reinforced base. Wear concentrates at the bottom and at the corners, so a 500D shell with a 1000D base panel and bound corners beats a uniform 1000D shell on both mass and cost.
- 500D shell, 1000D base
- Bound corners
- Lower total mass
What is the minimum order for a ranger patrol bag programme?
500 pieces per reference. A first sample comes back inside 6-10 working days, stretching to 12-15 where face, harness and insignia panel are all new, and bulk runs 35-50 days from pre-production sign-off, inspected at AQL 2.5.
- 500 pieces per reference
- Sampling 6-10 working days
- Bulk 35-50 days
How often should a patrol bag be inspected in service?
Check zips and radio pouch retention every 10 service days, strap binding and attachment rows every 20, and coating and insignia every 40. Four checks take about a minute and catch faults while they are still cheap to fix.
- Zips every 10 days
- Rows every 20 days
- Coating every 40 days
How should patrol bags be stored at the end of a season?
Empty, wipe, dry fully for at least 24 hours, then store loosely packed off the floor with zips open and straps relaxed. Bags stored damp come back in spring with mildew in the lining and corroded hardware.
- Dry 24 hours minimum
- Zips open
- Off the floor
How much does sampling and tooling cost for a patrol bag?
Budget USD 50-150 for the first sample and the charge returns when the bulk order is placed; tooling or screens for a new panel or insignia set cost USD 300-2,500. Pricing is issued 24-48 hours after a complete specification arrives, FOB Xiamen.
- Sample USD 50-150
- Tooling USD 300-2,500
- Quote in 24-48 hours
How is a ranger fleet shipped and what cube does it need?
One sea shipment at 25-35 days with cube planned under 28 CBM per 20GP and under 68 CBM per 40HQ, plus a compact air top-up running 5-8 days for pouch and panel spares. Nested packing with straps folded in cuts cube substantially.
- Sea 25-35 days
- 28 CBM per 20GP
- Air 5-8 days for spares