Home › Field notes › How MOLLE Attachment Works: Weave Path, Load Transfer and Limits
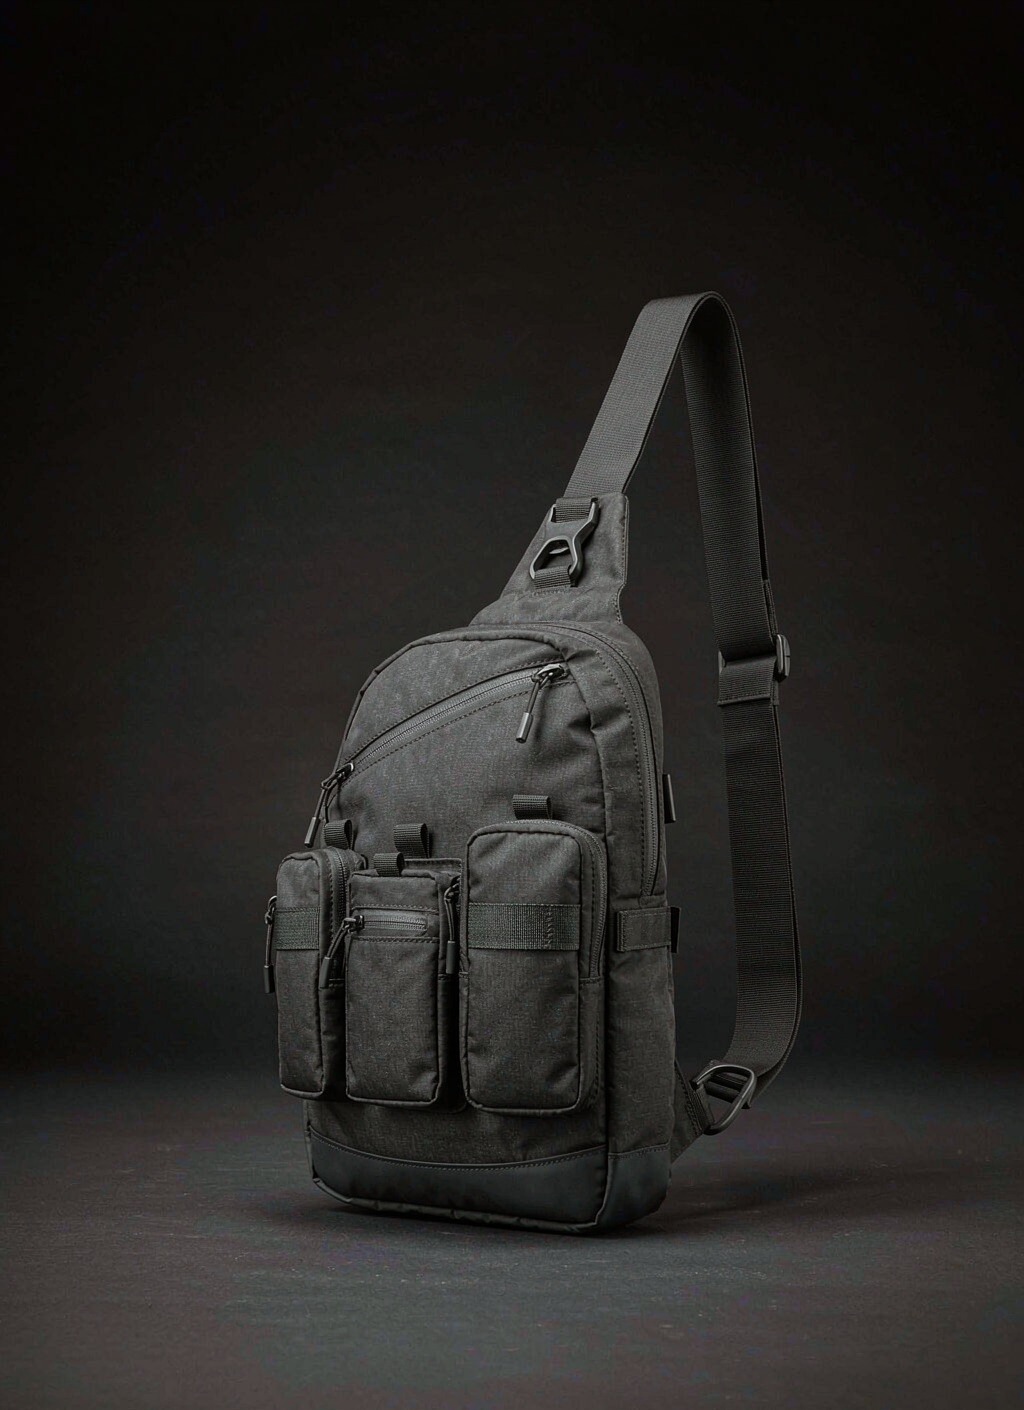
MOLLE attachment works by weaving a pouch's own 25 mm strap alternately over and under the horizontal webbing rows of a carrier face, so the rows capture the strap and pouch weight travels as shear through every engaged row instead of as peel on one seam. Rows sit at 38 mm pitch while the anchors recur every 50 mm along each one, and a closure or tucked strap end stops the weave from backing out during movement. Scope is civilian throughout: tool rolls, first-aid kits, camera inserts, bottle carriers and daily-carry pouches on a MOLLE attachment panel. Weapon carriage, ammunition storage, protective armour and any statement of defence approval sit outside this page and are not discussed.
The weave sequence and why alternation matters
The sequence is simple enough to describe in one sentence and subtle enough to be done wrong in production. The strap tip enters the first channel from the outside, crosses the first row from the front, the second from behind, the third from the front again, and keeps going until its length runs out, ending with the closure seated against the final row it wrapped. Alternation is the whole mechanism: a strap laid over every row without passing under any of them has nothing holding it but friction, and friction alone will not survive a day of walking.
Each reversal performs a specific job. Where the strap passes under a row, that row is pressed upward by the pouch weight, and the row reacts downward onto the strap. Where the strap passes over a row, the strap is pulled against the row's underside. The two effects alternate along the strap, and together they convert a single downward pull into a series of small opposing forces that cancel each other's tendency to withdraw the strap along its axis.
Strap length sets engagement, and engagement sets capacity. At 38 mm vertical spacing, a strap long enough to cross three rows engages roughly 114 mm of panel height; a strap crossing five rows engages about 190 mm. Those two attachments behave very differently under the same pouch mass, which is why a load figure quoted without an engagement count is not a useful specification.
Tip preparation is a small detail with a large effect. A soft strap tip cannot be pushed through a channel without the user pinching it flat, and users respond by folding the tip, which permanently creases the strap and makes later threading harder. A stiffened tip, produced by heat-cutting and sealing or by a folded and stitched end, threads in one motion and keeps its shape through hundreds of cycles.
Selection rule: Require a stiffened tip and a minimum of three engaged rows at 38 mm spacing on every woven module, because engagement count and tip stiffness together determine whether the attachment holds under load rather than under a showroom photograph.
Load transfer from strap tip to shell seam
Following the load is the fastest way to predict where a panel will fail. Pouch mass hangs from the pouch body. The body transfers that mass to the strap, the strap presses on each row it passes under, each row carries that force outward along its length to the anchoring points at both ends, the anchors transfer into the backing layer behind the face, and the backing passes the remainder on to the seam joining that panel into the chassis body. Every stage in that chain has a limit, and the weakest stage sets the capacity of the whole attachment.
In practice the chain fails at the anchors or at the seam, not at the webbing. Webbing of the correct width is stronger than the load a civilian pouch will ever impose; the anchor stitches and the shell seam are not. That is why backing stack and stitch density belong on the specification as written callouts with the same status as the grid geometry itself.
Peel is the failure mode to design against. When a pouch is loaded and the wearer leans forward, the pouch tends to rotate away from the panel, and that rotation applies a peeling force at the top row rather than a shear force across all rows. Peel concentrates everything on one row, which is why the top row of any grid is the first to show damage and why row-end anchoring at the top matters more than anywhere else on the panel.
Panel placement follows from the same analysis. A grid mounted on a stiffened back panel spreads load well because the backing is rigid; the same grid mounted on a soft side gusset will deform under load, and deformation changes channel geometry dynamically, letting the strap work loose. Buyers specifying pouches for side placement should expect lower capacity than the identical pouch mounted on a stiff face.
Verdict: Treat the top row and its end anchors as the critical elements of any woven attachment, because forward lean converts shear into peel and peel concentrates the entire pouch load onto the single row nearest the closure.
What stops the weave from backing out
Four mechanisms keep a woven strap in place, and a good specification uses more than one. The closure at the strap end is the primary one: a snap or a press-stud engaged after the final pass prevents the strap from withdrawing, because withdrawal would require the closure to pass back through a channel it cannot fit through. The second is friction between strap and webbing across every contact patch. The third is the geometry of alternation itself. The fourth is the tucked end, where the strap tip is passed back down behind the last row rather than left hanging.
Closures deserve more attention than they usually get. A snap that is too easy to open will open; one that is too stiff will be left unfastened by users, which is worse, because an unfastened weave relies on friction alone. Specifying a closure by its release force rather than by its part number gives a supplier something testable and gives the buyer a number to verify on a first-off sample.
Friction is often underestimated and rarely specified. It depends on strap width relative to the 25 mm webbing, on webbing surface texture and on whether either component is wet. A wet nylon-on-nylon contact has measurably less grip than a dry one, which is why a pouch that holds perfectly in a showroom can creep downward in rain. Programmes selling into wet climates should test the attachment wet rather than dry.
The tucked end costs nothing and adds real security. Passing the strap tip behind the final row before seating the closure means that even if the closure releases, the strap must reverse direction twice before it can withdraw. On modules carried where a snag is likely - dense brush, crowded transit, machinery - that second barrier is worth requiring in the drawing.
Bottom line: Specify a closure by release force, test the weave wet rather than dry, and require a tucked strap end on any module carried where snagging is likely, because a single snap left unfastened leaves friction as the only retention.
Failure signatures and the diagnostic route
Returned units tell a consistent story, and four signatures account for most of them. Row tear-out shows as a row detached at one or both ends while the webbing itself is intact, which points to anchoring rather than material. Strap creep shows as a pouch sitting lower than when fitted, usually traced to insufficient friction or an open closure. Edge unzip shows as the outermost row progressively releasing from its end. Closure slip shows as the snap parting under load, which is a hardware specification problem rather than a grid problem.
| Observed signature | What it indicates | Where to look first | Corrective specification line |
|---|---|---|---|
| Row detached at one end, webbing unbroken | Anchoring insufficient for the peel load | Row-end stitch density and bar-tack coverage | Add end anchoring at every row, top row first |
| Pouch sits lower than at fitting | Friction too low or closure not seated | Strap width against the 25 mm webbing | Match strap to webbing; test wet |
| Outermost row releasing progressively | Load concentrated at the panel edge | Edge binding and backing coverage at the border | Extend backing past the outer row |
| Closure parting under load | Hardware release force below duty | Closure specification and cycle count | Specify release force, not part number |
| Channel permanently widened | Oversized strap forced through | Strap tip stiffness and width | Stiffen tip; hold strap at 25 mm |
Diagnosis should start with the signature rather than with the supplier conversation. Three of the five signatures above are drawing defects, not workmanship defects, and a factory asked to fix a drawing defect by working more carefully will produce the same failure again on the next run. Establishing which of the two it is takes one returned unit and about ten minutes.
Cycle testing closes the loop. A specimen panel with a production pouch attached, cycled a few hundred times and then re-measured, will reveal creep that a static load test never shows. That test is cheap, needs no laboratory, and should be run before tooling is committed rather than after the first shipment lands.
Takeaway: Diagnose from the returned signature before contacting the supplier, because three of the five common woven failures are drawing defects that careful workmanship cannot fix and that will repeat across every 500-unit run until the callout changes.
Woven attachment compared with the alternative interface families
The woven grid is one of four ways to hold a module to a carrier, and the alternatives win on specific axes. Hook-and-loop is fastest and quietest to reposition but collects debris and loses grip when wet or loaded with lint. Magnetic capture gives one-handed placement and a clean exterior but adds cost and hardware mass and demands a defined pull direction. Quick-release hardware is strongest and most positive but adds bulk and cost per module and introduces a hard point on the panel.
| Criterion | Woven strap on a grid | Hook-and-loop field | Magnetic capture | Quick-release hardware |
|---|---|---|---|---|
| Reposition cycles before wear | Highest | Moderate, hook side fatigues | High, no wearing surface | High |
| One-handed placement | Poor, needs two hands and sight | Good | Best | Moderate |
| Noise in quiet environments | Low once seated | Audible on separation | Silent | Click on engagement |
| Behaviour when wet or dusty | Grip reduces when wet | Grip drops sharply with debris | Unaffected | Unaffected |
| Added cost per module | Lowest, strap only | Low | Highest | High |
| Third-party compatibility | Widest | Narrow, brand-specific | Narrow | Narrow |
| Repair in service | Strap replaceable by hand | Field replaceable | Module return usually needed | Part replacement |
Cost per module is the axis that decides most programmes, and it interacts with the range plan. A woven strap costs almost nothing per module, so a range of eight pouches can all carry one. Magnetic capture costs real money per module, so a programme using it tends to limit the number of modules offered, which reduces the appeal of a modular platform in the first place. The interface choice therefore shapes the catalogue, not just the individual product.
Hybrid designs are common and sensible. A pouch can carry a woven strap for primary retention and a small hook-and-loop patch at the top to stop rotation, or a magnetic element for initial placement with a woven strap for final security. Specifying two mechanisms of different types gives redundancy at modest cost, and it is the approach worth considering where a module carries anything valuable.
Judgement: Choose the woven grid where third-party compatibility and module count matter, add magnetic or hardware capture only where one-handed placement is a genuine user requirement, and never rely on hook-and-loop alone for a module carrying more than a light first-aid kit.
Stating a load limit by pouch class instead of one number
A single kilogram figure for a grid is the wrong instrument, because capacity depends on engaged rows, panel stiffness and placement. Stating limits per pouch class is more work at the specification stage and far more useful in the field, because it tells a user what a given module may carry rather than implying that every attachment point is equal.
| Pouch class | Engaged rows | Indicative mass band | Dominant limiting element |
|---|---|---|---|
| Flat organiser and document sleeve | Three | Under 0.5 kg | Panel stiffness, not the grid |
| First-aid module | Three to four | 0.5-1.5 kg | Top row anchoring under peel |
| Tool roll for site work | Four to five | 1.5-3 kg | Row-end anchoring and shell seam |
| Camera insert with padding | Four to five | 1.5-3 kg | Backing deformation on soft faces |
| Bottle carrier, full | Three | 0.5-1.5 kg | Closure release force |
| Bulky soft load, clothing roll | Five or more | Under 2 kg | Snag and profile, not strength |
The dominant limit column is the one that matters for a drawing. A first-aid module fails at the top row anchor, so that anchor is what gets specified. A tool roll fails at the shell seam, so the seam construction gets the attention. Naming the limiting element converts a vague strength requirement into a specific callout that a factory can actually quote and a buyer can actually verify.
Teams planning an organised everyday carry roster should read the bands as a starting point: they are indicative and should be confirmed against a cycled specimen rather than adopted as published limits. A programme that states them on packaging should first run the cycle test described earlier on the production construction, wet and dry, and retain the specimen as the reference for any later dispute.
Spec rule: Write a separate mass band and a named limiting element for each pouch class rather than one grid-wide figure, and confirm each band on a cycled production specimen before any number appears on packaging.
Verification, documents and programme facts behind an attachment panel
Four laboratory routes cover a woven attachment, and each answers a distinct question. Tensile and seam behaviour of the webbing and its anchoring is measured to ASTM D5034. Abrasion life of the webbing face under repeated strap insertion goes to ISO 12947. Water resistance of the finished face, checked before any coating claim enters the specification, follows AATCC 127. Lot release follows ISO 2859-1, general level II, at an acceptance quality limit of 2.5, with Major defects capped at 2.5 and Minor at 4.0 and no Critical defect accepted at all.
On the production side, an attachment programme is scheduled against webbing, hardware and any decorative element, since those three normally set the critical path rather than the sewing sequence. Output comes from a 4,950 m² SGS-verified production floor where 137 people work across 7 production lines and 149 machines, with capacity of 200,000 units per month. Experience behind the programme runs back to 2004, when the founder started in bag production, and the entity itself dates from 2014; sequencing runs sampling, then a pre-production sample, then AQL 2.5 inspection, then shipment.
Commercial mechanics are uncomplicated. Pricing is returned within 24-48 hours of a written specification landing, and one reference per 500 units is the entry volume. Sample development occupies 6-10 working days; where new hardware or a new construction is involved, allow 12-15 working days instead. Bulk then takes 35-50 days. Settlement is T/T 30/70 and the quoted term is FOB Xiamen. Sampling fees of USD 50-150 per reference come back to the buyer against the order, while tooling and screens cost USD 300-2,500. Sea transit takes 25-35 days, air 5-8 and express 3-5; a 20GP holds about 28 CBM while a 40HQ takes roughly 68 CBM.
Retained samples are the cheapest insurance available. One unit per reference, held from the approved lot and stored with the order number, resolves any later question about whether a shipment matches the construction that was approved far faster than a written description can, and our production team can hold those units on request.
Practical test: Hold one retained unit per reference from the approved lot, because a physical reference settles whether a later 35-50 day shipment matches the approved construction faster and more cheaply than any exchange of written descriptions.
Checks a buyer can run without a laboratory
Most of what matters can be verified on a desk. Thread a production strap through a production panel and count engaged rows; pull the loaded pouch forward and watch whether the top row lifts; cycle the attachment twenty times and re-measure the pouch position; wet the panel and repeat the pull. Each of those takes minutes and each one predicts a real field outcome better than a certificate does.
A second set of checks concerns the panel rather than the attachment. Look for anchoring at every row end, particularly the outermost row on each side. Check that backing extends past the outer row rather than stopping short of it. Confirm that the grid lies flat against the face with no bridging across a seam, since a row that bridges a seam will load that seam in a way the drawing never intended.
The third set is documentary. Ask for the interface drawing with the datum named, the first-off measurement record, and the revision history. A supplier who cannot produce a revision history for a panel that has been made before is unlikely to hold pitch on a new one, regardless of what the sample in front of the buyer looks like.
These checks belong at the sample stage and again at the pre-production stage, not only at final inspection. A problem found at sampling costs a redraw; the same problem found at final inspection costs a shipment, and found by a customer it costs the account. Buyers running a pouch-ready carrier range across several references should apply the same checklist to every reference, because failures cluster where attention lapses.
In short: Run the four desk checks - row count, forward pull, twenty-cycle creep and wet pull - at sampling and again at pre-production, because the same defect costs a redraw at sampling, a shipment at final inspection and the account if a customer finds it.
Frequently asked questions
How does MOLLE attachment actually hold a pouch in place?
The pouch strap is woven alternately over and under the carrier's webbing rows at 38 mm vertical spacing. Each reversal blocks the strap from withdrawing along its own axis, and friction across contact patches adds retention. A closure at the strap end prevents back-out.
- Alternation provides the mechanical lock
- Friction supplements it
How many PALS rows should a woven strap pass through?
Three engaged rows is a practical minimum for civilian duty; four or five suit tool rolls and camera inserts. At 38 mm spacing, three rows engage roughly 114 mm of panel height and five about 190 mm, spreading the same mass over more anchors.
- Three rows minimum
- Five for the heavier classes
Why does the weave have to alternate over and under?
A strap laid over every row without passing under any is held by friction alone, which will not survive a day of walking. Alternation converts one downward pull into a series of opposing forces, each resisting withdrawal along the strap axis.
- Alternate every row
- Never rely on friction alone
What stops a woven strap from working itself loose?
Four mechanisms: the end closure, friction between strap and the 25 mm webbing, the geometry of alternation, and a tucked strap end passed behind the final row. Specifying two or more gives redundancy against snagging and vibration.
- Specify closure by release force
- Require a tucked end where snag risk exists
Can woven attachment be used on a curved panel?
Yes, but curvature cuts the usable channel height and soft faces deform under load, letting the strap work loose. A side-gusset mounting therefore carries less than the identical pouch on a stiffened back panel, and the trial should be done on the curved part itself.
- Expect lower capacity on soft faces
- Trial on the production panel
How much weight can a woven pouch carry in civilian use?
State limits by class rather than one figure: organisers under 0.5 kg, first-aid modules 0.5-1.5 kg, tool rolls and camera inserts 1.5-3 kg. Each class has a different limiting element, from top-row anchoring to shell seam strength.
- Bands are indicative
- Confirm on a cycled specimen
What is the difference between a snap closure and a tucked strap end?
A snap blocks withdrawal mechanically and is the primary retention; a tucked end is a passive second barrier that requires two reversals before the strap can escape. The tuck costs nothing and still holds if the closure is left unfastened.
- Snap: primary, specify release force
- Tuck: redundancy at no cost
How do you test whether a woven attachment will hold?
Run desk checks before laboratory work: count engaged rows, pull the loaded pouch forward and watch the top row, cycle twenty times and re-measure position, then repeat wet. Laboratory confirmation uses ASTM D5034 for tensile and seam behaviour.
- Desk checks first
- Then named laboratory reports
Does laser-cut MOLLE work the same way as sewn webbing?
The weave mechanics are identical, since the strap still alternates through openings at the same 38 mm pitch. Service life differs: cut slot edges polish sooner than sewn webbing, and a cut panel cannot be repaired by hand in the field.
- Same mechanics, shorter service life
- Not field repairable
What causes a MOLLE row to tear away from the shell?
Row tear-out with intact webbing points to anchoring, not material. Forward lean converts shear into peel and concentrates the pouch load on the top row, so that row and its end anchors need the highest stitch density on the panel.
- Inspect row-end anchoring
- Strengthen the top row first
How often can a pouch be re-attached before the webbing wears?
Sewn webbing tolerates the most cycles of any interface family; hook-and-loop fatigues sooner and cut slot edges polish earlier. Rather than quoting a figure, run twenty cycles at sampling and re-measure pouch position on the production construction.
- Sewn rows last longest
- Verify by cycling the real build
What sampling time applies to a woven attachment panel?
Sample development runs 6-10 working days per reference, or 12-15 working days where the build is new, against an entry volume of 500 units. Bulk then takes 35-50 days, quotations come back within 24-48 hours, and terms are T/T 30/70 FOB Xiamen.
- 6-10 days for known builds
- 12-15 days for new constructions
Which inspection level applies to woven pouch shipments?
Release inspection follows ISO 2859-1 at an acceptance quality limit of 2.5, general level II. Missing row-end anchoring is classed critical and pitch drift classed major, since both change function rather than looks; appearance issues sit in the minor class at 4.0.
- Level II sampling
- Write the defect classes into the order
Should a pouch strap be stiffened at the tip?
Yes. A soft tip forces users to fold it to thread, and the fold creases the strap permanently. A heat-sealed or folded and stitched tip threads in one motion and keeps its shape through hundreds of cycles on a 500-unit run.
- Stiffen every strap tip
- Prevents permanent creasing