Home › Field notes › Modular Bag Testing: Durability and Stress Test Protocols
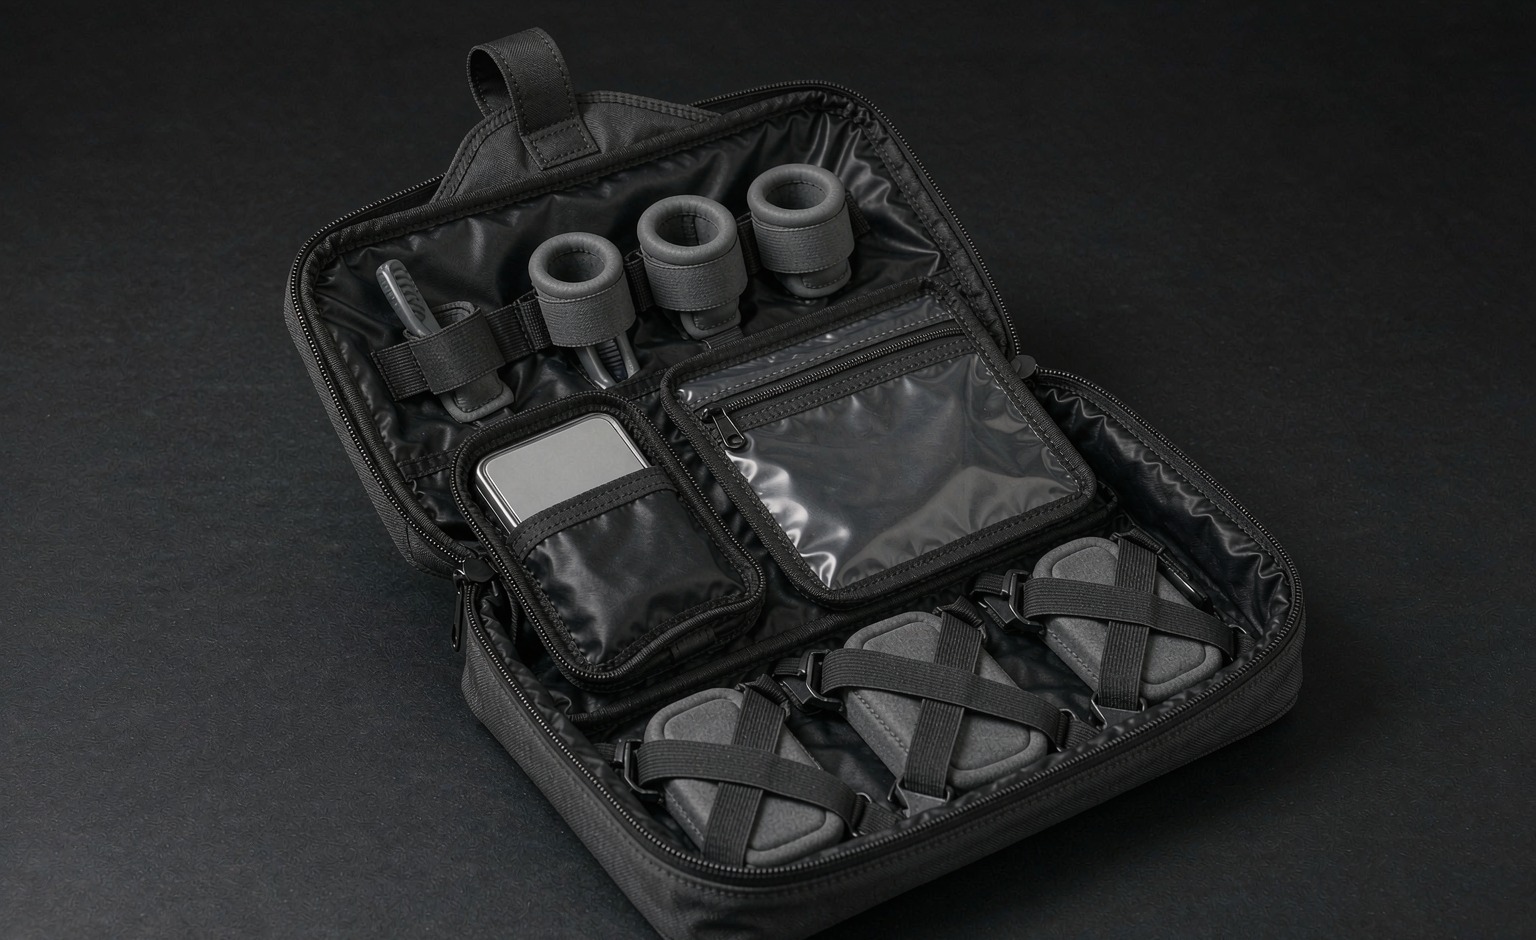
A modular bag needs three test families, not one: seam and anchor strength, surface endurance, and interface cycling, because the detachable parts almost always fail before the shell fabric does. The attachment field is the reason. Rows of 25 mm webbing set at 38 mm vertical spacing with a 50 mm horizontal repeat create hundreds of stitch nodes, and each node is a place where load concentrates and where a needle has perforated the coating. Testing that only pulls a fabric strip misses every one of them. This guide sets out the methods that matter, the specimen preparation that decides whether a result means anything, the acceptance lines worth writing into a specification, and the way ISO 2859-1 sampling at AQL 2.5 converts laboratory evidence into a shipment decision.
The failure modes set out here are the ones that recur in production: backing lifting behind a reinforcement stitch, hook geometry polished smooth, and coatings separating after surface wear.
Where a modular carrier actually breaks: interface-first failure
A conventional sewn-shut bag has one continuous load path. Fabric carries tension into a seam, the seam carries it into a strap, the strap carries it into a buckle. When such a bag fails, it usually fails at the weakest link in that chain and the failure is visible: a seam opens, a strap tears out, a buckle cracks. A modular carrier does not behave that way. It has a primary path through the shell and a set of secondary paths through every detachable element, and the secondary paths change as the user reconfigures the bag. That variability is what makes durability testing on this product category genuinely difficult.
Start with the attachment field. Rows of 25 mm webbing spaced 38 mm apart vertically and repeating every 50 mm horizontally produce a lattice that a user loads in peel, in shear, and in a combination of both. Peel is the damaging one. A pouch hanging off the outside of a pack generates a lever arm; the top of the pouch pulls away from the shell while the bottom compresses against it, so the top stitches are loaded in a direction they were never optimised for. A test that only pulls the webbing straight out along its own axis reports a reassuring number and predicts nothing about field behaviour.
The second site is the closure. A snap fitting, a hook-and-loop field, or a ladderlock on a detachable module cycles every time the user reconfigures. Cycling is not wear from load; it is wear from repetition, and it degrades differently. Hook-and-loop loses hook geometry long before it loses tape strength, so a pull test on an aged hook-and-loop field still passes while the field quietly stops holding a pouch in place under vibration. Snap fittings lose retention force gradually, and the user notices only when a module drops off in a car park.
The third site is the coating-to-fabric bond, which is invisible until it lifts. A shell fabric can pass an abrasion test on the face and still fail in the field because the backing has separated from the weave behind a bar tack. That is a bond problem, not a fabric problem, and it is caught by coating adhesion testing rather than abrasion testing. Any specification that lists only abrasion has already decided not to look.
A useful way to frame the whole plan: a modular bag is a structure with N interfaces, and the probability that at least one interface disappoints a user grows with N. The test plan therefore has to scale with the number of interfaces rather than with the size of the bag. A 22-litre shell with eleven attachment points deserves more test coverage than a 45-litre duffel with two.
Selection rule: Scale the coverage with the number of attachment interfaces rather than with the volume of the shell, because a compact chassis carrying eleven mounting points deserves more lines in the matrix than a large carrier with two, and each added row also lengthens the 6-10 working day build.
Building the test matrix: method, property and the pass line
A test matrix exists to stop arguments. Without one, a durability discussion becomes a debate about adjectives, and adjectives do not resolve a claim. Each row of the matrix should name a method, the property that method actually reports, the specimen and conditioning required, and an acceptance threshold expressed as a number with a unit. Where a buyer cannot write a number, the row is not finished.
| Method | Property reported | Specimen and conditioning | Acceptance line to specify |
|---|---|---|---|
| ASTM D5034 | Tensile strength and elongation of a grabbed fabric strip | 100 mm strip, conditioned 24 h at 20 °C / 65 % RH | Record warp and weft separately; no value below 70 % of the shell nominal |
| ASTM D3884 | Abrasion resistance of a coated face under rotary pressure | Flat mounted specimen, abradant and load named in the report | Name the abradant and the load; cycles to first broken yarn, not cycles to hole |
| ISO 12947 | Abrasion endpoint under Martindale rub counting | Four specimens minimum, endpoint defined as two broken threads | Report endpoint cycles plus the endpoint definition used |
| ASTM D751 | Coating adhesion and blocking resistance of a coated fabric | Strip peeled from substrate after conditioning | Adhesion in newtons per 25 mm; no coating transfer to the backing |
| AATCC 127 | Water resistance of a fabric under hydrostatic head | Six specimens, rate of head rise stated | Head in centimetres at third penetration; test again after abrasion |
| AATCC 8 | Colour transfer under dry and wet crocking | Cotton cloth, 10 cycles, graded on the grey scale | Grade 4 minimum dry, grade 3 minimum wet on dark shades |
| ASTM B117 | Corrosion behaviour of plated or painted hardware | 5 % neutral salt fog, duration and reading time named | Hours to first red rust on a functional surface; cosmetic faces graded separately |
| ISTA 3A | Parcel survival for a single shipped unit under 32 kg | Complete packed unit, drop and vibration sequence | No functional damage; cosmetic scuffing permitted on named faces only |
Two conventions make the matrix usable. First, name the conditioning. A tensile result on a fabric tested straight out of a dry warehouse and a result after 24 hours at standard conditions are not comparable, and a laboratory report that omits conditioning is not evidence. Second, name the endpoint. Abrasion results are meaningless without the endpoint definition, because cycles to first broken yarn and cycles to visible hole differ by a large factor on the same fabric.
Note also what the matrix does not contain. It does not contain MIL-STD-810 as a pass-fail protocol for a commercial product. That document is a set of environmental test methods written for military procurement, and citing it on a retail product page implies a qualification the product has not undergone. Reference MIL-STD-105 only as the historical ancestor of ISO 2859-1 sampling, and reference MIL-STD-810 only when a buyer specifically asks whether a method in it can be adapted. Neither belongs on a hangtag.
Specimen preparation and conditioning: the quiet source of false passes
More durability arguments are lost in specimen preparation than in the testing itself. A result generated on a specimen cut from the wrong place, or tested after the wrong conditioning, is worse than no result, because it carries the authority of a laboratory letterhead while describing something that will never happen in the field.
Cut location matters most on modular builds. A specimen taken from the centre of a panel has never been near a needle. A specimen taken 6 mm from a bar tack has been perforated dozens of times, and its strength is lower. Test both, and record which is which. If a specification quotes only the clean-panel value, the numbers on the report describe a bag that does not exist. On a modular shell we ask the laboratory to cut at least one set of strips through an attachment row so the perforation effect is visible in the data.
Conditioning matters next. Coated nylons and polyesters change stiffness with moisture content, and stiffness changes how a specimen grips and how it fails. Standard conditioning is 24 hours at 20 °C and 65 % relative humidity; a report that omits it should be returned. Where a product is sold into a genuinely wet duty, test a second set after wet conditioning, because the dry value will flatter the material.
Ageing is the third variable and the one most often skipped. A hook-and-loop field tested new performs better than the same field after 500 open-close cycles. A snap fitting tested at room temperature performs differently at 5 °C with gloves on. If the product will be used cold, specify cold-conditioned cycling. The extra laboratory time is small next to the cost of discovering the problem after a season of returns.
Finally, sample size. One specimen proves nothing about a production run. For fabric properties, three to five specimens per direction is the practical minimum, and the report should show individual values rather than only an average, because a wide spread between specimens signals inconsistent fabric or inconsistent coating and is itself a finding.
Verdict: Take several specimens per construction from the stated location and report individual values instead of one average, since a wide spread between specimens signals inconsistent fabric or coating and is a finding in its own right.
Seam and anchor strength: what ASTM D5034 does and does not tell you
ASTM D5034 measures the breaking force and elongation of a fabric strip gripped across its width. It is the workhorse method for shell fabric acceptance and it is genuinely useful, provided everyone remembers what it measures. It measures fabric. It does not measure seam efficiency, it does not measure stitch strength, and it does not measure the pull-out resistance of a webbing anchor stitched to that fabric.
Seam efficiency is the ratio of seamed strength to fabric strength and is reported as a percentage. A seam that reaches 80 % of the fabric value is doing well; one that reaches 55 % is telling you the thread, the stitch density, or the needle size is wrong for that fabric. Because seam efficiency is a ratio, it is far more informative than an absolute number, and it should be an explicit line in the specification.
Anchor pull-out is the number that matters most on a modular build, and it needs its own fixture. The test is simple to describe: clamp the shell, pull the webbing anchor at the angle the pouch actually loads it, record the force at first stitch failure and at complete separation. Two angles are worth running. Axial pull, straight along the webbing, typically gives the highest value and is the one an inexperienced laboratory will run by default. Peel pull, at 90 degrees or more to the panel, gives a lower value and is closer to what a loaded pouch does. Specify both.
Stitch construction drives the result. Bar tacks are the standard reinforcement at an anchor, and their length, width, and stitch count should be drawn rather than described. A bar tack that is too short relative to the webbing width leaves the outer stitches doing all the work; one that is too long perforates more fabric than it reinforces. Backing plates spread the load and are worth specifying at high-load anchors even though they add cost and a small amount of weight.
Set the acceptance line from the duty, not from a round number. A pouch that carries a 1.5 kg camera body on a bouncing vehicle generates far more than 1.5 kg of instantaneous force. A safety factor of four to five times the static load at the anchor is a defensible starting point for gear that a person cannot afford to drop, and the factor should be stated in the specification so the laboratory knows what it is testing towards.
Bottom line: Write the safety factor between service load and anchor failure into the laboratory request, then re-check the same anchorage on lots drawn at AQL 2.5, because evidence from one pre-production piece says nothing about what the line produced several weeks later.
Abrasion and coating endurance: ASTM D3884, ISO 12947 and ASTM D751
Abrasion testing is where specifications most often go wrong, because the method is easy to commission and easy to misread. ASTM D3884 runs a rotary abrader against a flat mounted specimen under a named load with a named abradant. ISO 12947 counts Martindale rubs to a defined endpoint. Both are comparative rather than predictive: they rank materials against each other under one set of conditions, and they do not tell you how many months a bag will last.
That distinction matters. A fabric that reaches 30,000 cycles on one abradant may reach a very different number on another, and the number has no direct translation into field life. What the test is good for is comparability: run the candidate and the incumbent in the same commission, with the same abradant and load, and the ranking is real. Ranking is what a buyer actually needs when choosing between two shells.
| Signature | Mechanism | Detection route | Corrective action |
|---|---|---|---|
| Backing lifts behind a bar tack | Coating-to-weave bond lower than stitch stress concentration | ASTM D751 adhesion after stitch perforation | Change backing chemistry or add a backing patch at the anchor |
| Hook face polishes smooth | Repeated engagement wears hook geometry before tape fails | Cycle then measure peel strength on the aged field | Specify hook density and move the field off a flexing panel |
| Webbing edge frays and draws in | Heat cut edge too shallow; yarns migrate under cyclic load | Visual after 2,000 flex cycles at the anchor | Require folded and stitched ends, or a wider hot-knife seal |
| Print cracks at a fold | Ink film less extensible than the substrate | Fold and crease, then AATCC 8 on the crease | Change ink system or relocate the graphic off the fold |
| Plastic hardware whitens at stress points | Crazing from moulded-in residual stress plus UV | UV exposure then visual and drop at 5 °C | Change resin grade, anneal, or thicken the section |
| Liner abrades against webbing ends | Hook-side tape rubbing an incompatible lining | ISO 12947 on the lining against the tape | Change liner yarn or bind the tape edge |
Coating adhesion deserves its own line in every modular specification, because modular shells are perforated far more heavily than conventional ones. ASTM D751 reports adhesion as force per unit width and also reports blocking, which is the tendency of a coated face to stick to itself under pressure and heat. Blocking failures turn up as a bag that arrives from a warm container with panels fused together, which is a warehouse problem rather than a laboratory curiosity.
One more combination is worth commissioning: abrasion followed by water resistance. A fabric can pass AATCC 127 at 60 cm new and drop to 20 cm after 5,000 abrasion cycles, because the finish has been mechanically removed. The number that describes the product after six months is the second one. Specify the sequence, not just the individual tests.
Water, salt and hardware: AATCC 127, ASTM B117 and closure cycling
Water resistance is reported as a hydrostatic head, measured by AATCC 127 as the height of a water column at which the third penetration appears on the back of the specimen. It is a fabric test, not a bag test. A fabric can pass at 60 cm while the bag leaks freely at the zip, the needle holes, and the seam, because the test does not see any of those. Any claim about the finished product therefore needs a whole-article test alongside the fabric one.
Whole-article water testing does not need to be elaborate to be informative. A shower test with a defined spray rate and duration, run on a stuffed bag with the closure in its normal position, and then an internal inspection with a moisture indicator paper, will find zip wicking and needle-hole leakage that no fabric test can. Set the duration from the duty: five minutes for an urban commuter product, longer where the product is sold for sustained wet use.
Hardware corrosion is the other environment failure, and ASTM B117 is the standard tool. Neutral salt fog at 5 % concentration, with the duration and the reading time named in the report, separates plated finishes quickly. Read the result carefully: the number of hours to first red rust on a functional surface is the important figure, while cosmetic staining on a hidden face is a different and less serious finding. Where a product will be used near the sea or in a humid coastal market, 48 hours of fog is a reasonable minimum screen for load-bearing hardware.
Closure cycling is the test most specifications omit and the one that generates the most field complaints. Define the cycle: engage and release the fitting, or open and close the hook-and-loop field, a stated number of times, then re-measure retention force or peel strength. Five hundred cycles is a sensible first screen for a module that a user reconfigures weekly; two thousand is appropriate for a daily-use fitting. Record the retention after cycling as a percentage of the new value and set the floor, typically 70 % to 80 %.
Where the product includes a magnetic-guided snap fitting, add two conditions that laboratory cycling alone misses. Test engagement with a gloved hand, because that is how the product is used in cold weather and the tactile cue is different. And test retention under vibration with the module loaded, because a fitting can hold a static load perfectly and still walk loose on a rough vehicle. Both are cheap tests and both catch real complaints.
Takeaway: Commission sequences rather than isolated tests and budget the extra laboratory time inside the 6-10 working day window, because a shell can hold a water column when new and lose most of that performance once abrasion has removed the finish.
Transit and drop: ISTA 3A for a packed modular set
A modular set is usually shipped as a shell plus several pouches, which is a different parcel problem from a single bag. The pouches move, the corners of the box are loaded differently, and the empty space inside the shell becomes a crush zone. ISTA 3A covers individual packaged products up to 32 kg moved through a parcel delivery system, and it is the right protocol for a direct-to-consumer or single-carton distribution model.
The sequence matters more than any single step. Drop testing finds corner and closure damage. Vibration finds abrasion between components and hardware that works loose. Compression finds crushed panels and deformed frames. Running one of the three in isolation gives a partial answer; the sequence is designed to reproduce the cumulative damage of a real parcel journey.
Pack out the pouches deliberately. Loose pouches inside the shell rattle and abrade; pouches packed in an inner bag and placed in a defined position arrive intact. The specification should state where each module sits in the carton, and the transit test should be run on the production pack-out rather than on a convenient arrangement. This is the same principle as specimen preparation: test what will ship, not what is easiest to prepare.
Set the acceptance criteria before the test. No functional damage is the obvious line. Cosmetic scuffing should be explicitly permitted on named faces and prohibited on others, because a scuffed bottom panel is acceptable and a scuffed front panel is a return. Write the permitted faces into the specification so the laboratory report can be read as a pass or fail rather than interpreted.
One further step is worth commissioning where the product ships with a retail carton: test the carton, not just the bag. Box compression strength drops sharply with humidity, and a modular set shipped through a monsoon season or a humid port can arrive with softened cartons that stack badly in a warehouse. Specify the board grade and ask for the compression test at a conditioned humidity relevant to the route rather than at standard laboratory conditions only.
Judgement: Put the complete pack-out, shell and every pouch together through a parcel sequence, specify the board grade, and request compression figures conditioned to the route rather than to laboratory defaults, since a humid container on a 25-35 day crossing punishes cartons that were optimised for cost alone.
From laboratory evidence to a shipment release gate
Laboratory testing on a pre-production sample tells you whether the design is sound. It does not tell you whether the shipment is sound, because the shipment is made by people and machines having a bad week. The bridge between the two is acceptance sampling, and ISO 2859-1 is the framework most commercial programmes use.
The mechanism is simple in outline. Define the lot, choose a general inspection level, look up the sample size code letter for the lot size, then apply the acceptable quality limit to get the accept and reject numbers for each class of defect. At AQL 2.5 with a normal inspection plan, the sample size and the accept number follow from the lot size; a buyer does not invent them. Classify defects before inspecting, because a critical defect, a major defect, and a minor defect carry different limits and mixing them makes the result unusable.
| Defect class | Example on a modular build | Limit applied | Disposition on rejection |
|---|---|---|---|
| Critical | Snap fitting releases under minimum specified load; broken needle fragment in the filling | Zero acceptance at any sample size | Lot held, full sort, root cause before any release |
| Major | Attachment row misaligned so a pouch will not mount; seam slippage above the specified value | AQL 2.5 | Re-sort or rework at the production site, then re-inspect |
| Minor | Cosmetic scuff outside the named permitted faces; label skew within tolerance | AQL 4.0 | Accept with a recorded concession, or sort at destination |
| Functional but unmeasured | Module mounts but with more force than the specified range | AQL 2.5 with a defined gauge | Gauge the whole lot if the sample fails |
The single most valuable addition to any inspection plan for a modular product is a go/no-go gauge for the interface. A pouch that mounts only with excessive force, or a webbing row whose spacing has drifted, will not be caught by visual inspection but will generate returns. A simple gauge that must pass through the field with a defined force turns an opinion into a measurement and lets an inspector check hundreds of units a day.
Written acceptance criteria must include the dimensional drift allowed on the attachment field. 25 mm webbing spaced at 38 mm vertically and repeating every 50 mm horizontally is a system, and tolerances accumulate across rows. Specify the tolerance on the repeat and on the cumulative distance across ten rows, because the second is what determines whether a third-party pouch fits at the bottom of the field.
Spec rule: Tie laboratory evidence to shipment release with a sampling plan quoted at AQL 2.5 and with tolerances written for both the row pitch and the cumulative distance across ten rows, because either omission leaves the third-party pouch question unanswerable.
Programme timing, sampling cost and what to commit before tooling
Testing takes calendar time, and the calendar is what actually constrains a launch. Allow 6–10 working days to build a first piece, 12–15 when the construction is complex or new hardware is involved. The run itself then takes 35–50 days once that piece is approved. Laboratory testing either runs in parallel with sampling or adds to it, and it is worth deciding early which it will be.
Parallel is usually right. Commission the fabric and coating tests on the candidate materials while the first sample is being cut, so that a fabric rejection does not arrive after the sample is built. Commission the interface cycling and the anchor pull-out on the first sample itself, because those depend on the construction rather than the material. That split typically removes one to two weeks from a launch calendar at no extra laboratory cost.
Cost is modest in context. A focused commission covering tensile, abrasion, coating adhesion, hydrostatic head, crocking and a salt fog screen is a small fraction of a tooling budget that runs USD 300–2,500 for screens, moulds and dies. Where a programme needs a transit test, ISTA 3A adds laboratory time and a parcel cost but is usually cheaper than the returns it prevents.
Settlement and logistics follow the same calendar discipline. Standard terms are T/T 30/70 with the balance due against a passed inspection, quoted FOB Xiamen. Freight choice is a calendar decision: sea freight 25–35 days, air 5–8 days, courier 3–5 days. A buyer who discovers a laboratory failure three weeks before a launch date has only two options, and both are expensive, so the test plan belongs at the start of the calendar rather than at the end.
Capacity planning matters too. A modular programme that grows will eventually need a production slot that is reserved rather than negotiated; our production team schedules 7 production lines staffed by 137 people operating 149 machines across the 4,950 m² SGS-verified production floor, which is 200,000 units per month at full load, and a buyer placing repeat modular orders benefits from telling the production team the annual volume early so that fabric and hardware can be reserved against it. Our production team can also hold retained samples from an approved lot, which makes any later durability dispute resolvable by comparison rather than by argument.
Frequently asked questions
How many test methods does a modular bag specification actually need?
Six is a workable minimum: tensile under ASTM D5034, abrasion under ASTM D3884 or ISO 12947, coating adhesion under ASTM D751, hydrostatic head under AATCC 127, hardware corrosion under ASTM B117, and a cycling test on every closure. Add ISTA 3A where the product ships as a single parcel, and add a cold-conditioned cycling run where it will be used below 10 °C.
Why does ASTM D5034 not tell me whether my attachment will hold?
Because it grips and pulls a fabric strip, while an attachment fails in peel at a stitch node. Add a dedicated anchor pull-out test run at two angles: axial along the 25 mm webbing, and at 90 degrees to simulate a loaded pouch. The peel figure is typically well below the axial one and is the number to specify against.
What acceptance limit should I set for anchor pull-out?
Start from the static load the module carries and apply a safety factor of four to five. A pouch holding 1.5 kg of equipment bouncing in a vehicle generates far more than 1.5 kg instantaneously, so the anchor should be specified to hold 6 kg to 8 kg at first stitch failure, tested in peel.
How many abrasion cycles are enough?
There is no universal number, because the abradant and the load change the result. Use abrasion comparatively: run the candidate and the current fabric in one commission with identical settings and compare rankings. Report cycles to first broken yarn with the endpoint stated, never cycles to hole, which flatters the material.
Should I test water resistance again after abrasion?
Yes. A finish can give 60 cm hydrostatic head under AATCC 127 when new and drop below 20 cm after 5,000 abrasion cycles because the finish has been mechanically removed. Specify the sequence, fabric abrasion followed by hydrostatic head, so the reported number describes the product after use rather than out of the box.
What does ASTM B117 tell me about buckles and snaps?
It gives hours to first red rust on a functional surface under 5 % neutral salt fog. For load-bearing hardware on a product sold into coastal markets, 48 hours is a reasonable minimum screen. Grade cosmetic staining on hidden faces separately from corrosion on a load path, because the two have very different consequences.
How long does the testing phase add to my development calendar?
Less than most buyers expect if the work is split. Budget 6–10 working days to build the first piece, 12–15 when the design is complex, and 35–50 days for the run itself. Run material tests in parallel with sample cutting and construction tests on the finished sample, and the laboratory work adds close to zero net calendar time.
What is AQL 2.5 and how does it apply to modular bags?
It is an acceptable quality limit used with ISO 2859-1 sampling to decide whether a lot ships. Sample size and accept numbers follow from lot size and inspection level rather than being chosen freely. Apply AQL 2.5 to major defects such as a misaligned 50 mm attachment repeat, and zero acceptance to critical defects such as a fitting that releases below load.
Why should I build a go/no-go gauge for the attachment field?
Visual inspection will not catch a field whose spacing has drifted enough to make a pouch mount only with excessive force, and that condition generates returns. A gauge that must pass through the field under a defined force converts an opinion into a measurement and lets an inspector check hundreds of units per day.
How many specimens should a laboratory report show?
Three to five per direction as a minimum, with individual values shown rather than only an average. A wide spread between specimens signals inconsistent fabric or inconsistent coating and is itself a finding. A single-specimen report is not evidence about a production run.
Can I reference MIL-STD-810 in a commercial specification?
Only carefully. It is a set of environmental test methods written for defence procurement, and citing it implies a qualification a commercial product has not undergone. Reference MIL-STD-105 only as the historical predecessor of ISO 2859-1 sampling, and keep both off product pages and hangtags.
What conditioning should I insist on before any fabric test?
Twenty-four hours at 20 °C and 65 % relative humidity is standard, and any report that omits conditioning should be returned. For a product sold into genuinely wet duty, commission a second set after wet conditioning, because a dry test flatters coated fabric.
How do I test a magnetic-guided snap fitting properly?
Run three conditions: retention force new, retention force after 500 to 2,000 engagement cycles, and retention under vibration with the module loaded. Add a gloved-hand engagement check at 5 °C, because a fitting can hold a static load perfectly and still be awkward or walk loose in real use.
Does the shell need testing differently from a non-modular bag?
Yes, because the attachment field perforates the fabric. Ask the laboratory to cut at least one set of strips through an attachment row so the perforation effect appears in the data. Clean-panel values alone describe a bag that does not exist.
What should the specification say about cosmetic damage after transit?
Name the faces. Permit cosmetic scuffing on the bottom and back panels and prohibit it on the front panel and lid, then run ISTA 3A on the production pack-out with pouches positioned as they will ship. Without named faces, the report cannot be read as a pass or fail.
Who keeps the evidence if a durability dispute arises a year later?
Ask for retained samples from the approved lot to be held by the production side and for the laboratory reports to reference lot numbers. Our SGS-verified production base can retain approval samples against a programme, which turns a later disagreement into a comparison rather than an argument about adjectives.